I want to add a dark mode for my WordPress Website, yes, it’s what you now currently surfing in.
So, I decided to insert JavaScript code in my website.
First, I need to install a plugin for me to insert JavaScript, I chose WPCode, you can choose any plugins else.
What I want to do is to insert the switch button on the header. So, I open my website by the Edge (You can use any browser else), and press Ctrl + Shift +I (It may be different in different browsers) to open the developer tools.
I use the location tool to find the header in the source of the website.
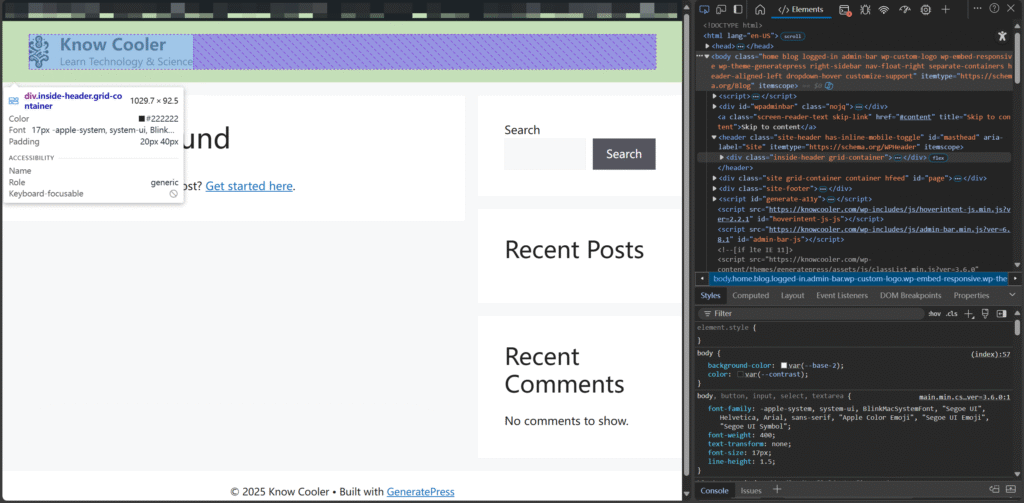
I copy the code of header; it was like this.
<div class="inside-header grid-container">
    <div class="site-branding-container"><!-- The code of Brand & Logo --></div>
    <!-- Some code for mobile phone -->
    <div id="primary-menu" class="main-nav">
        <ul id="menu-nav" class=" menu sf-menu">
            <li id="menu-item-50" class="menu-item menu-item-type-custom menu-item-object-custom current-menu-item current_page_item menu-item-home menu-item-50">
                <a href="https://knowcooler.com" aria-current="page">Home</a>
            </li>
        </ul>
        <!-- I need to insert a button here -->
    </div>
</div>What I need to do is to add a button to the list “menu-nav”.
Since I want my code load after the <body> element loaded, so remember to insert it in the footer, instead of the header.

In JavaScript, locate the <div> element “menu-nav”.
const menuNav = document.getElementById('menu-nav');Then add a button.
const darkModeBtn = document.createElement('button');
darkModeBtn.id = 'dark-mode-toggle';
darkModeBtn.innerHTML = `<i class="fas fa-moon"></i>`; // moon stands for dark mode

// add the button into the list
darkModeBtnLi.appendChild(darkModeBtn);
menuNav.appendChild(darkModeBtnLi);I use the icon from Font Awesome, so I need to add another HTML on my header.
<link rel="stylesheet" href="https://cdnjs.cloudflare.com/ajax/libs/font-awesome/6.5.1/css/all.min.css">Decide what happen when you click the button.
document.getElementById('dark-mode-toggle').addEventListener('click', function() {
    // dark mode
    document.body.classList.toggle('dark-mode');

    // update the icon
    this.querySelector('i').classList.toggle('fa-moon');
    this.querySelector('i').classList.toggle('fa-sun');

    // save the preference to localStorage
    localStorage.setItem('darkMode', document.body.classList.contains('dark-mode'));
});When open the page, load user’s preference.
window.addEventListener('load', function() {
    const isDarkMode = localStorage.getItem('darkMode') === 'true';
    if (isDarkMode) {
        document.body.classList.add('dark-mode');
        document.getElementById('dark-mode-toggle').querySelector('i').classList.remove('fa-moon');
        document.getElementById('dark-mode-toggle').querySelector('i').classList.add('fa-sun');
    }
});Now let’s look at the code.
const menuNav = document.getElementById('menu-nav');
const darkModeBtnLi = document.createElement('li');
const darkModeBtn = document.createElement('button');
darkModeBtn.id = 'dark-mode-toggle';
darkModeBtn.innerHTML = `<i class="fas fa-moon"></i>`;
darkModeBtnLi.appendChild(darkModeBtn);
menuNav.appendChild(darkModeBtnLi);
document.getElementById('dark-mode-toggle').addEventListener('click', function() {
document.body.classList.toggle('dark-mode');
this.querySelector('i').classList.toggle('fa-moon');
this.querySelector('i').classList.toggle('fa-sun');
localStorage.setItem('darkMode', document.body.classList.contains('dark-mode'));
});
window.addEventListener('load', function() {
    const isDarkMode = localStorage.getItem('darkMode') === 'true';
    if (isDarkMode) {
        document.body.classList.add('dark-mode');
        document.getElementById('dark-mode-toggle').querySelector('i').classList.remove('fa-moon');
        document.getElementById('dark-mode-toggle').querySelector('i').classList.add('fa-sun');
    }
});And now turn to CSS.
I find the CSS style by developer tools.
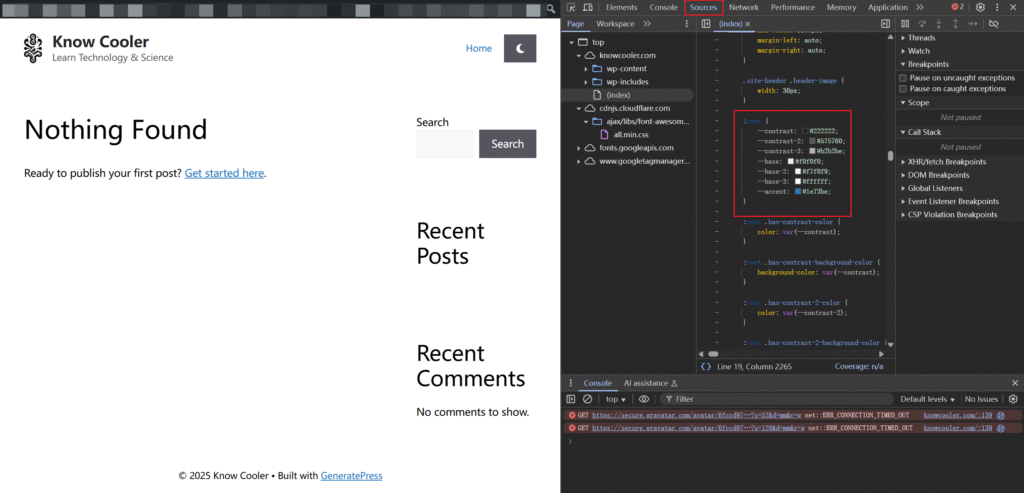
Now see the variates
--contrast: #222222;
--contrast-2: #575760;
--contrast-3: #b2b2be;
--base: #f0f0f0;
--base-2: #f7f8f9;
--base-3: #ffffff;
--accent: #1e73be;Then, change the color following the mode.
.dark-mode{
	--contrast: #f6f5f5;
   --contrast-2: #575760;
   --contrast-3: #b2b2be;
   --base: #000000;
   --base-2: #2a2b2d;
   --base-3: #000000;
   --accent: #dedfdf;
}You can change your website like this.
If you want to change another style, just edit the CSS code.
For example, I need to change the logo picture, which will turn to white when the dark mode is enabled.
Using developer tools, locate the image’s location.
<img class="header-image is-logo-image" alt="Know Cooler" src="https://knowcooler.com/wp-content/uploads/2025/07/logo.png" width="750" height="1225">And add this in my CSS code.
.dark-mode .is-logo-image{
  content: url('https://knowcooler.com/wp-content/uploads/2025/07/logow.png')
}I also add a function to detect if the browser is in dark mode.
function isDarkMode() {
  return window.matchMedia("(prefers-color-scheme: dark)").matches;
}

if (isDarkMode()) {
  document.body.classList.add("dark-mode");
} else {
  document.body.classList.remove("dark-mode");
}